How to Root Realme 8 Using Magisk and SuperSu
How to Root Realme 8 Using Magisk and SuperSu – Today, through this article, I will show how to root Realme 8. We will use Magisk Manager and SuperSu application to root Realme 8. This process will be very simple and will be in the English language. Before starting this process, let me warn you that if your mobile phone is dead in this process, then I will not have any responsibility. Do this process at your own risk. Here you will not be told any wrong procedure.
How to Install Custom Rom on Realme 8 Pro Click here
Quick specification of Realme 8
|
6.4-inch FHD sAmoled (60Hz) |
|
MediaTek Helio G95 Processor |
|
5000 mAh (30W Fast Charging) |
|
64MP + 8MP + 2MP + 2MP |
|
16MP |
|
4GB/8GB |
|
128GB |
|
Android 11 (Realme UI 2.0) |
|
Flipkart & Realme Store |
Advantage of Rooting in Realme 8.
- Can easily install Custom Rom.
- You can customize your mobile phone in your own way.
- You will have complete control over your mobile.
- Uninstall pre-install apps.
- You can install all the applications of Root.
DisAdvantage of Rooting in Realme 8.
- If your mobile phone is in Warranty then you will lose your Warranty.
- If you make any mistake at the time of rooting, then your phone can be brick.
- Your phone’s entire security will be gone.
- You will not get OTA Update on your phone.
How To Root Realme 8 Using Magisk and SuperSu

This process is only for Realme 8 . Do not try to call this process to someone else. Otherwise your phone may be dead.
There are 4 easy Steps in this process .
Step 1. Bootloader Unlock on Realme 8
Step 2. Flash TWRP Recovery on Realme 8
Step 3. Root Realme 8 Via Magisk and SuperSu
Step 4. Check Root on Realme 8 Via Root Checker
Pre-Requirement for Realme 8
- You charge your phone more than 75%.
- A PC / Laptop will be required.
- You have full Backup of your Mobile.
- You Carry the Original USB cable of Realme 8.
- SDK Platform-Tools Application for Computer.
- Realme USB Driver for Computer.
- Realme 8 TWRP Recovery File.
- The bootloader of this phone should remain unlocked.
- Magisk Manager and SuperSu App For Realme 8
[Download Required File]
| SDK Platform Tool | Download |
| ADB & Fastoot Driver | Download |
| Realme USB Driver | Download |
| Realme Unlock App | Download |
| TWRP Recovery | Download |
| Magisk Manager | Download |
| SuperSu | Download |
Step 1: Unlock Bootloader On Realme 8
- First, check the latest Software Update on your mobile.
(Settings → About → Software Update)
- After this, you will have to enable the Developer Mode of your phone.
After going to Settings-About Phone → Baseband & Kernel → Build Number, click on it 7-8 times. And after this, your Developer Mode will be enabled.
- Now you have to Enable USB Debugging and OEM Unlock of your phone.
Settings → Additional setting → Developer Options → Enable USB Debugging and OEM Unlock.
- Download and install Realme Unlock Tool.
- Then Open the Realme Unlock Tool app and click on Start Applying.
- After clicking on Start Applying, the agreement has to be accepted and click on Submit Application.
- After clicking on Submit Application, your submitted application will check Realme Server. This process may take about 1 hour.
- After some time you will get the message of Review Successful in the application.
- After the review is successful, you have to click Start the in-depth test.


- After this, your phone will automatically reboot in Fastboot mode.
You have to do the further process on your PC / Laptop.
- Now you have to install Realme USB Driver on your computer.
- Make sure in your computer that ADB Fastboot Drivers are installed in your computer.
- Now you have to download SDK Platform Tools and install it on your PC / Laptop.
- After this, you have to go to the Command Prompt from the SDK Platform Tools file.
You have to click the Shift Key + Right Mouse Button on the empty space in your computer’s SDK Platform Tools folder.

Above you have to type CMD in the location containing the file.


- After this, you have to connect your Realme 8 to a PC / Laptop via USB Cable.
- Make sure that your phone stays in Fastboot mode.
- After this, you have to type the Command in your PC / Laptop in this way
1 command:-
‘adb reboot bootloader’ (Enter)
2 command:-
‘fastboot flashing unlock’ (Enter)
- Now the bootloader of your Realme 8 has been unlocked.
- After this, you have to come to your phone and select Unlock The Bootloader with the help of the Volume Down button and press the Power button. After this, your phone will be rebooted.
Step 2: Flash TWRP Recovery on Realme 8
- Now you have to download the TWRP Recovery file for Realme 8 on your PC / Laptop.
- Move this TWRP Recovery file to SDK Platform Tools.
- TWRP recovery file has to be renamed with this name twrp.img
- Now you have to go to Command Prompt on your computer.
You have to click the Shift Key + Right Mouse Button on the empty space in your computer’s SDK Platform Tools folder.
- Then you have to boot your phone in Fastboot Mode.
(Switch off your phone and after switching off, press the Volume UP + Power button simultaneously)
- After this, you have to connect your phone with the Computer via USB cable.
1.command :-‘
adb reboot bootloader’ (Enter)
2.command :-
‘fastboot devices’ (Enter)
3.Command :-
fastboot flash recovery twrp.img’ (Enter)
- After this, TWRP Recovery Mode will be installed on your phone.
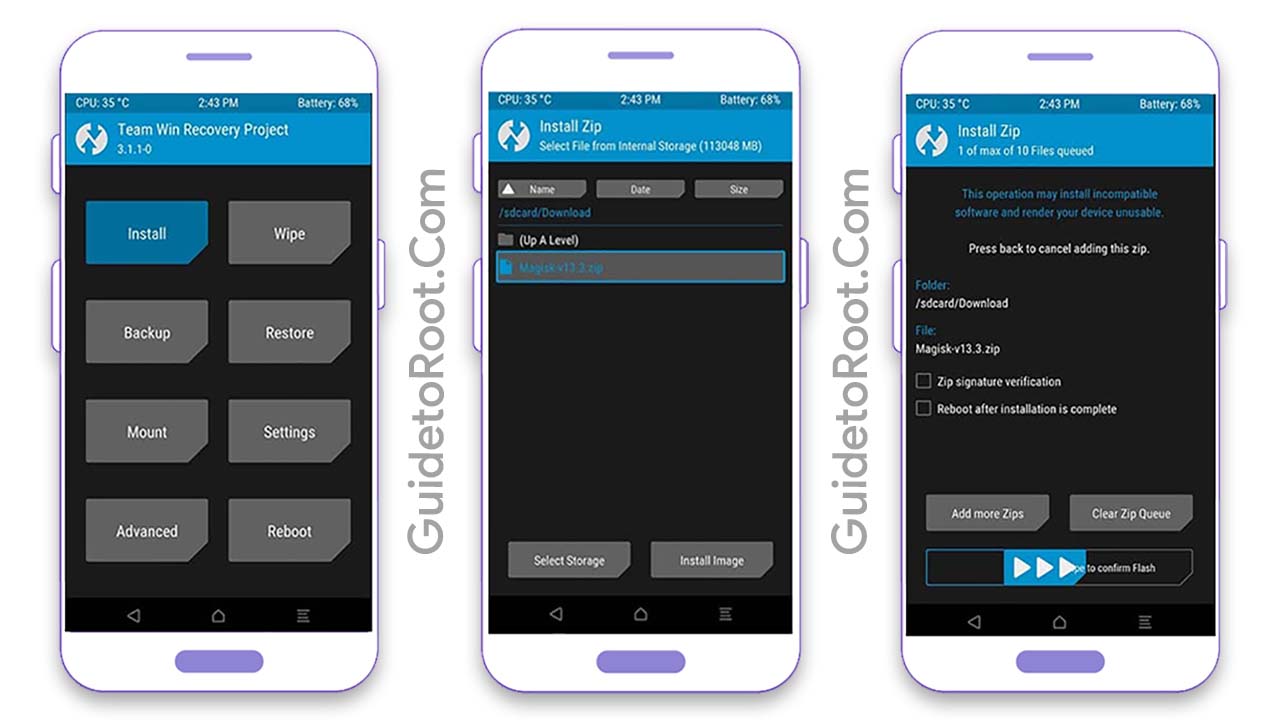
Step 3 :Root Realme 8 Via Magisk and SuperSu
Magisk Manager :-
- First, download the Magisk Manager File on your phone.
- Now move the Magisk Manager file to your internal storage.
- Make sure that TWRP Recovery Mode is properly installed on your phone.
- After this, you have to switch off your Realme 8 and after switch off, you have to press Volume Down + Power Button simultaneously. After that, your phone will come to TWRP Recovery Mode.


- Click on Install.
- After clicking install, you have to select the Magisk Manager file and Slide Swipe To Confirm Flash.
- After the flash, you have to click on the Reboot System.
- Now your Realme 8 has been completely rooted.
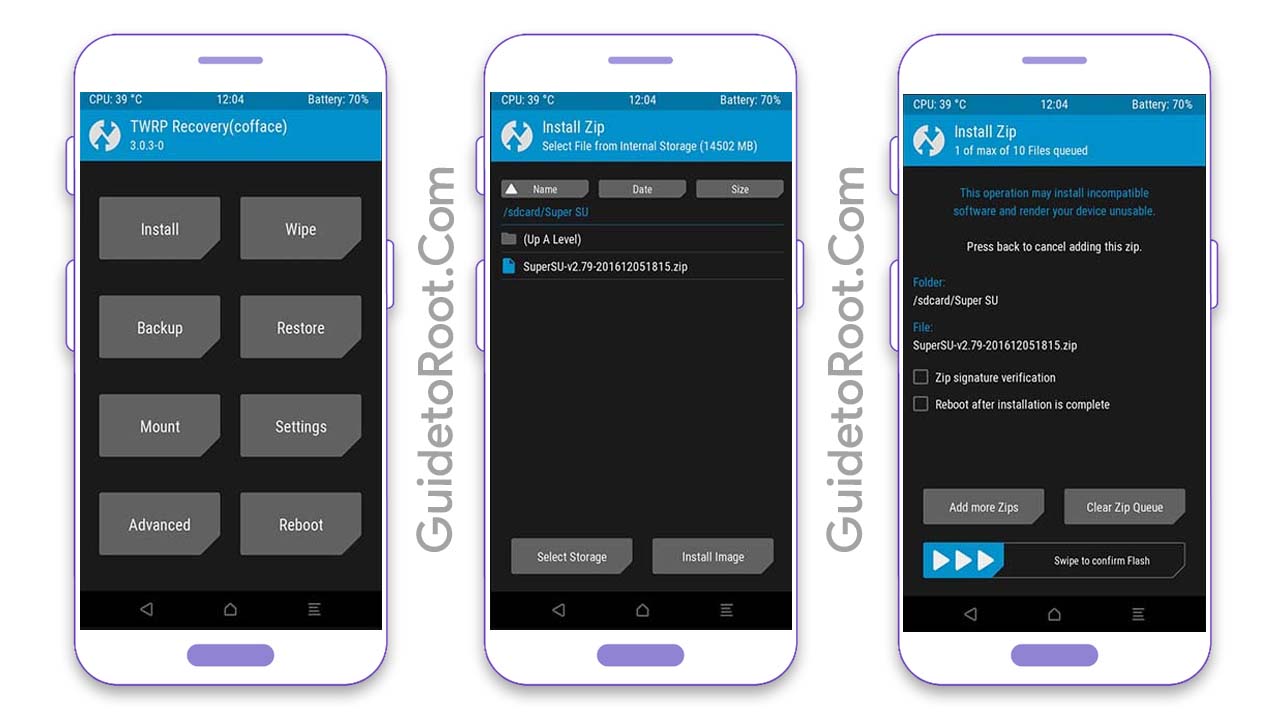
SuperSu:-
This is the second process of rooting.
- First, download the SuperSu on your phone.
- Now move the SuperSu file to your internal storage.
- After this, you have to switch off your Realme 8 and after switch off, you have to press Volume Down + Power Button simultaneously. After that, your phone will come to TWRP Recovery Mode.


- Click on Install.
- After clicking install, you have to select the SuperSu file and Slide Swipe To Confirm Flash.
- After the flash, you have to click on the Reboot System.
- Now your Realme 8 has been completely rooted.
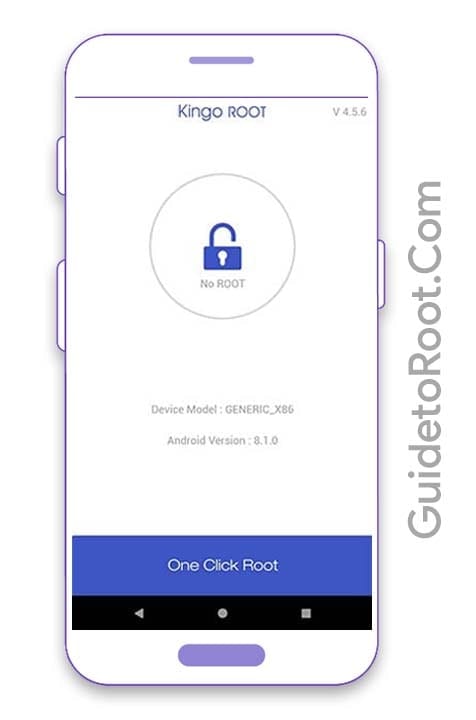
Step 4: Check Root on Realme 8 Via Root Checker
- First of all, you have to install the Root checker App on your phone from Play Store.
- After this, you have to open the app and click on Verify Root.
- Now you have to give grant permission in the app.
- You will get the message: Congratulations in the app! Root Access is properly installed on this device.


Thank you for taking the time to this website.
I hope that you have understood this process, if you have received any help from it, then share this hopeful process with your friends. If you have any questions, then comment below. Thank you!
